
Maytag Bravo XL Washer Manual: A Comprehensive Guide
Today, April 21st, 2026, at 3:30:13 AM, begin your journey with this manual – a complete resource for effortlessly understanding and utilizing your Maytag Bravo XL washer.
Welcome! This manual serves as your definitive guide to the Maytag Bravo XL washing machine, designed to provide years of reliable performance. We understand that a new appliance requires familiarization, and this resource is crafted to ensure a seamless and successful experience.
The Maytag Bravo XL is engineered with advanced features to tackle a wide range of laundry needs, from everyday loads to heavily soiled items. This manual details everything from initial setup and operation to troubleshooting and maintenance, empowering you to maximize your washer’s potential.
Before operating your new machine, please take the time to thoroughly read this manual. Understanding its functions and safety precautions will contribute to optimal performance and longevity. We are confident that the Maytag Bravo XL will become an indispensable part of your household routine, delivering consistently clean and fresh laundry.

Safety Precautions & Warnings
Important Safety Instructions: To reduce the risk of fire, electric shock, or injury when using your Maytag Bravo XL washer, adhere to the following precautions. Always disconnect the power supply before servicing. Do not operate the washer if the power cord or plug is damaged.
Keep children and pets away from the washer during operation. Never climb on or inside the machine. Use only detergents and additives recommended for washing machines. Avoid contact with hot water and moving parts.
Ensure the washer is properly grounded. Do not modify or attempt to repair the appliance yourself; contact a qualified technician. Improper installation or use can void the warranty and create hazardous conditions. Read all instructions before use and retain this manual for future reference. Your safety is our priority!
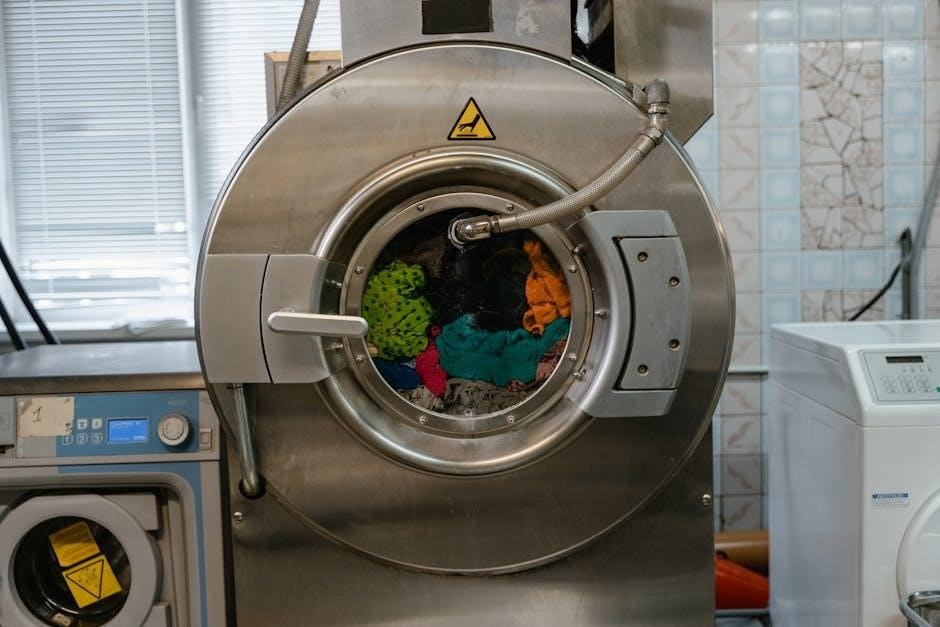
Understanding Your Washer’s Components
The Maytag Bravo XL washer is engineered for reliable performance. Familiarizing yourself with its parts ensures optimal use and maintenance. Key components include the control panel, which manages wash cycles and settings, and the washer interior – featuring a stainless steel wash basket designed for durability.
The water inlet valves control the flow of hot and cold water, while the drain pump efficiently removes wastewater. The motor powers the wash basket, and the transmission facilitates agitation and spin cycles. Don’t forget the detergent dispenser, crucial for proper cleaning.
Understanding these elements allows for effective troubleshooting and care. Regularly inspect these parts for wear and tear to maintain peak performance and extend the life of your Maytag Bravo XL.
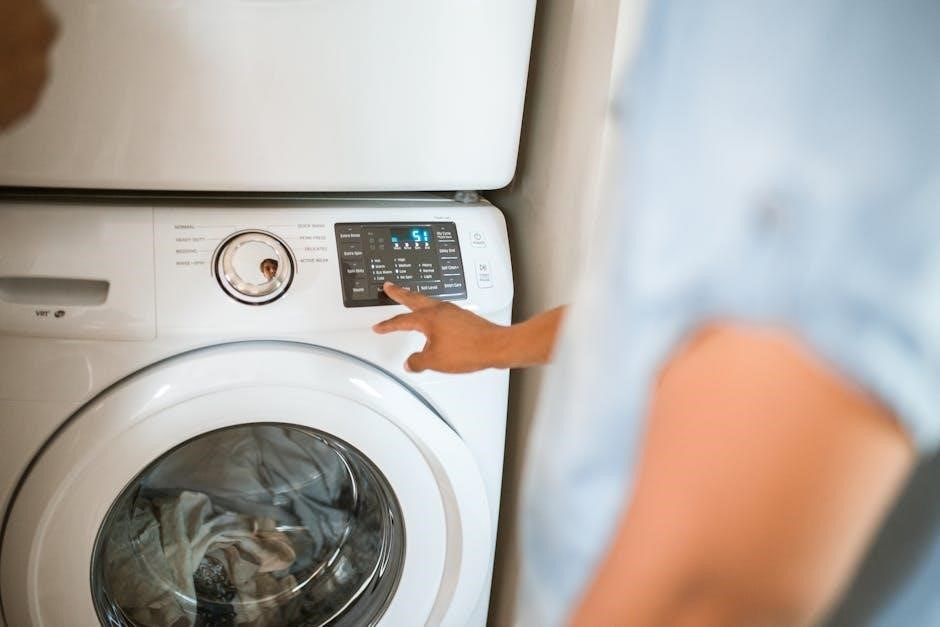
3.1 Control Panel Overview
The Maytag Bravo XL’s control panel is intuitively designed for ease of use. The cycle selector dial allows you to choose from various wash cycles – Normal, Delicates, Heavy Duty, and Quick Wash, among others. Temperature settings enable you to select the ideal water temperature for your load.
Load size options adjust water levels for efficient washing. The spin speed control lets you customize the final spin, minimizing wrinkles. Modifier buttons offer additional features like extra rinse or soil level adjustment. A clear digital display shows cycle progress and estimated time remaining.
Familiarize yourself with each button and dial to unlock the full potential of your washer. Proper understanding ensures you select the optimal settings for every laundry load.
3.2 Washer Interior & Parts Identification
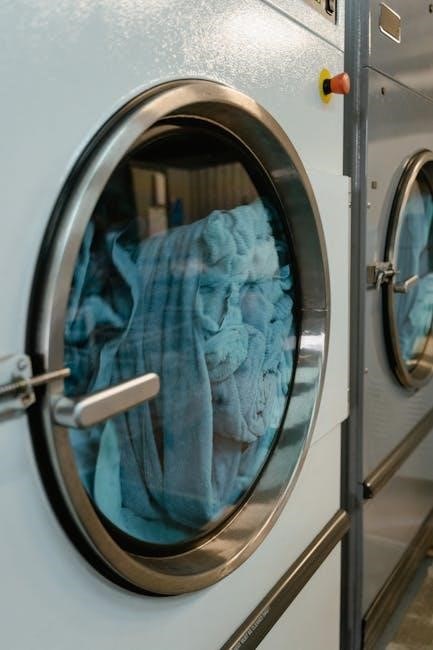
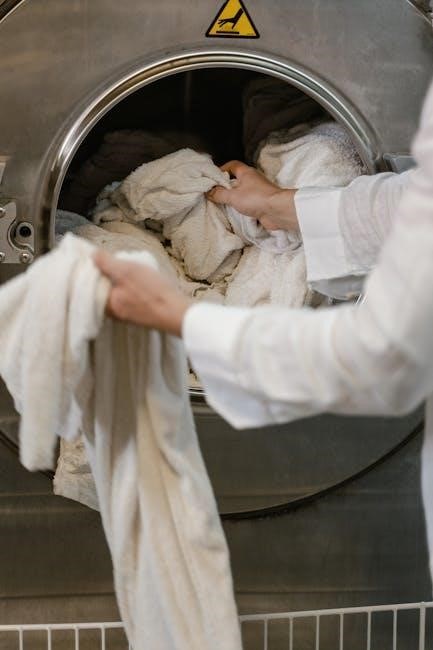
Inside your Maytag Bravo XL, you’ll find several key components. The stainless steel wash basket securely holds your laundry during the wash and spin cycles. The detergent dispenser, typically divided into compartments, accepts detergent, fabric softener, and bleach. Locate the fabric softener dispenser and bleach dispenser carefully.
A removable lint filter traps lint and debris, maintaining clean drainage. The washer’s agitator (or impeller in some models) creates the washing action. Inspect the water inlet valves, responsible for filling the washer. The drain pump efficiently removes water after each cycle.
Understanding the location and function of each part is crucial for proper maintenance and troubleshooting. Regular inspection helps ensure optimal performance and longevity of your Maytag Bravo XL washer.
Getting Started: Initial Setup
Before your first wash, proper setup is essential for optimal performance. Begin by removing all shipping materials from inside the drum and around the washer’s exterior. Carefully inspect for any damage incurred during transit. Next, position the washer in its designated location, ensuring adequate space for water connections and ventilation.
Crucially, the washer must be level to prevent excessive vibration and noise. Proceed to leveling the washer using the adjustable feet – detailed in section 4.1. Then, connect the water supply lines, ensuring tight, leak-proof connections. Refer to section 4.2 for detailed instructions.

Finally, run an initial cleaning cycle with no laundry to flush out any manufacturing residue. Your Maytag Bravo XL is now ready for use!
4.1 Leveling the Washer
Achieving a perfectly level washer is paramount to minimizing vibration, reducing noise, and ensuring optimal performance. Begin by placing a level on top of the washer, checking both front-to-back and side-to-side alignment. If the washer is uneven, adjust the leveling feet located at each corner.
Rotate the feet clockwise to lower that side of the washer, and counterclockwise to raise it. Make small adjustments, rechecking with the level after each turn. Continue this process until the bubble in the level is centered, indicating a level surface.
Important: Ensure all four feet are firmly in contact with the floor. Tighten the lock nuts against the washer’s base to secure the feet in place, preventing unwanted movement during operation. A stable, level washer contributes significantly to its longevity.
4.2 Connecting Water Supply Lines
Properly connecting the hot and cold water supply lines is crucial for your Maytag Bravo XL washer’s operation. Locate the water inlet valves on the back of the washer, typically color-coded – blue for cold and red for hot. Ensure your water supply has adequate pressure (typically 20-100 psi).
Attach the supplied water hoses to the corresponding inlet valves, hand-tightening initially, then using pliers to tighten another half to three-quarters of a turn. Avoid over-tightening, which can damage the valves or hoses. Connect the other ends of the hoses to your home’s hot and cold water faucets.
Caution: Slowly turn on the water supply faucets and check for leaks at both the washer connections and the faucet connections. Tighten connections as needed to eliminate any leaks.
Operating Instructions: Wash Cycles
Your Maytag Bravo XL washer offers a variety of wash cycles designed to handle different fabric types and soil levels. Familiarizing yourself with these cycles ensures optimal cleaning and garment care. The control panel allows easy selection of the appropriate cycle for your laundry needs.
Available cycles typically include Normal/Regular for everyday items, Delicates/Hand Wash for fragile fabrics, Heavy Duty for heavily soiled loads like towels and work clothes, and Quick Wash for lightly soiled items needing a fast refresh. Additional cycles may include Bulky Items, Whites, and Colors.
Important: Always check garment care labels before selecting a wash cycle. Adjust water temperature and spin speed according to fabric recommendations for best results and to prevent damage.
5.1 Normal/Regular Cycle
The Normal/Regular cycle on your Maytag Bravo XL washer is designed for everyday laundry – think cottons, linens, and durable synthetics with moderate soil levels. This cycle utilizes a combination of washing and rinsing actions to effectively remove dirt and stains while maintaining fabric integrity.
Typically, the Normal/Regular cycle employs a medium water temperature and a standard spin speed. However, these settings are often adjustable via the control panel, allowing customization based on your specific load. For heavily soiled items within this category, consider pre-treating stains or adding a laundry booster.
Tip: For optimal results, avoid overloading the washer. A properly loaded machine allows garments to move freely, ensuring thorough cleaning. Always check care labels!
5.2 Delicates/Hand Wash Cycle
The Delicates/Hand Wash cycle on your Maytag Bravo XL washer is specifically engineered for fragile items requiring gentle care. This includes lingerie, silk, lace, and items labeled “hand wash only.” This cycle minimizes agitation and utilizes a slower spin speed to prevent stretching, snagging, or damage to delicate fabrics.
Typically, this cycle uses cold water to further protect sensitive materials. Always place delicate items inside a mesh laundry bag for added protection during the wash cycle. Avoid washing delicate items with heavier, more abrasive fabrics like denim or towels.
Important: While this cycle offers a gentler approach, always verify the garment’s care label before use. Some extremely delicate items may still require true hand washing.
5.3 Heavy Duty Cycle
The Heavy Duty cycle on your Maytag Bravo XL washer is designed for tackling heavily soiled items and durable fabrics like work clothes, towels, and bedding. This cycle utilizes a longer wash time, increased agitation, and a higher spin speed to effectively remove stubborn dirt, grime, and stains.
For optimal results, pre-treat heavily soiled areas with a stain remover before loading the washer. Avoid overloading the machine, as this can reduce cleaning effectiveness. Use a heavy-duty detergent formulated for tough stains and consider using warm or hot water (check garment care labels first!).
5.4 Quick Wash Cycle
The Quick Wash cycle on your Maytag Bravo XL washer is perfect for lightly soiled items that need a refresh. This cycle provides a shorter wash time – typically around 30 minutes – making it ideal for small loads or when you’re short on time. It utilizes moderate agitation and a lower water level to efficiently clean clothes without excessive wear and tear.
This cycle is best suited for items like recently worn clothes, or lightly soiled everyday wear. Use a standard detergent and avoid overloading the washer to ensure optimal cleaning performance. While effective for light soils, it may not fully remove stubborn stains.
Important: Do not use this cycle for heavily soiled items or bulky loads.
Using Detergent & Additives
Proper detergent usage is crucial for optimal cleaning performance with your Maytag Bravo XL washer. Always use High Efficiency (HE) detergents, as standard detergents create excessive suds that can hinder washing and potentially damage the machine. Liquid or powder HE detergents are both acceptable, but follow the manufacturer’s recommended dosage based on load size and soil level.
Avoid using too much detergent, as residue can build up on clothes and inside the washer. Fabric softener and bleach can also be used, but always dilute liquid bleach with water before adding it to the dispenser. Refer to the dispenser guide for proper compartment usage.
Caution: Never pour detergent directly onto clothes.
6.1 Recommended Detergent Types
For your Maytag Bravo XL washer, utilizing High Efficiency (HE) detergents is absolutely essential. Traditional detergents produce an excessive amount of suds, which can negatively impact wash performance and potentially cause damage to the internal components of your machine. HE detergents are specifically formulated to produce fewer suds while maintaining powerful cleaning capabilities.
Both liquid and powder HE detergents are suitable for use. When selecting a detergent, consider your laundry needs – liquid detergents excel at dissolving in cold water, while powder detergents are often more cost-effective. Always adhere to the detergent manufacturer’s dosage recommendations, adjusting the amount based on load size and soil level.
Important: Using non-HE detergents will void your warranty.
6.2 Dispenser Usage Guide
The Maytag Bravo XL washer features a convenient dispenser for detergent, fabric softener, and bleach. Located within the dispenser drawer, each compartment is clearly labeled. For optimal results, always follow these guidelines.
Detergent Compartment: Pour the recommended amount of HE liquid detergent into this compartment. Do not overfill. Fabric Softener Compartment: Add liquid fabric softener, diluting it with water if necessary, to avoid staining. Bleach Compartment: Use only liquid chlorine bleach, and dilute it with water before adding it to the designated compartment.
Ensure the dispenser drawer is fully closed after each use. Regularly clean the dispenser to prevent buildup and maintain optimal performance. Refer to the ‘Cleaning & Maintenance’ section for detailed cleaning instructions.
Troubleshooting Common Issues
This section addresses frequent problems encountered with your Maytag Bravo XL washer, offering solutions to get you back on track. If your washer won’t start, verify the power cord is securely plugged in and the lid switch is engaged. A washer not draining often indicates a clogged drain hose or pump filter – inspect and clear any obstructions.
Pay attention to error codes displayed on the control panel; these provide valuable diagnostic information. Consult the detailed ‘Error Codes & Their Meanings’ subsection for specific interpretations and recommended actions. If issues persist after attempting these solutions, avoid self-repair and contact a qualified technician for assistance.
Always disconnect the power supply before performing any inspection or maintenance.

7.1 Washer Won’t Start
If your Maytag Bravo XL washer fails to initiate a cycle, begin with the simplest checks. First, ensure the power cord is firmly connected to a functioning electrical outlet. Test the outlet with another appliance to confirm it’s receiving power. Second, verify the lid switch is properly engaged; the washer won’t start if the lid isn’t securely closed.
Third, check your home’s circuit breaker or fuse box to rule out a tripped breaker or blown fuse. Reset if necessary. Finally, if these steps don’t resolve the issue, there might be an internal problem requiring professional diagnosis. Do not attempt to disassemble the washer yourself; contact a qualified service technician for repair.
7.2 Washer Not Draining
Encountering a Maytag Bravo XL washer that won’t drain can be frustrating. Initially, check the drain hose for kinks or obstructions. Ensure it isn’t bent or pinched, restricting water flow. Next, inspect the drain hose connection to the standpipe or laundry tub; confirm it’s securely in place and not clogged.
Then, locate and carefully clean the drain pump filter. This filter often traps lint, coins, and other debris. Refer to your manual for its specific location and cleaning instructions. Lastly, if the issue persists, a malfunctioning drain pump might be the culprit, necessitating professional repair. Avoid attempting complex repairs yourself; contact a certified technician for assistance.
7.3 Error Codes & Their Meanings
Your Maytag Bravo XL washer utilizes error codes to diagnose potential issues. An “F01” code typically indicates a water inlet valve problem, potentially restricting water flow. “F02” suggests an issue with the water level switch, impacting fill accuracy. If you see “F03”, it signals a drain pump malfunction, preventing proper water removal.
A “F04” error often points to a lid switch problem, interrupting the wash cycle for safety. “F05” indicates a motor overload, requiring a reset or professional attention. Remember, these are common codes; consult your full manual for a comprehensive list and specific troubleshooting steps. Ignoring error codes can lead to further damage, so address them promptly.
Cleaning & Maintenance
Regular cleaning extends the life of your Maytag Bravo XL washer and ensures optimal performance. Monthly, run an empty hot water cycle with a washing machine cleaner to remove residue buildup. Pay attention to the detergent dispenser; remove and rinse it thoroughly every few months to prevent clogs.
Wipe down the washer’s exterior with a damp cloth and mild detergent. Inspect the door seal for mold or mildew, cleaning it with a bleach solution if necessary. Periodically check the drain pump filter for lint and debris. Proper maintenance prevents odors and keeps your washer functioning efficiently, saving you time and money in the long run.
8.1 Cleaning the Washer Interior
To maintain a fresh and efficient washing machine, clean the interior of your Maytag Bravo XL monthly. Run a complete cycle with hot water and a washing machine cleaner – specifically designed to remove residue. Alternatively, use two cups of white vinegar as a natural cleaning agent.
Ensure the washer is empty during this cleaning cycle. After the cycle, wipe down the drum with a clean, damp cloth. Pay close attention to areas where detergent or fabric softener may accumulate. This process eliminates odors, prevents mildew growth, and keeps your washer performing at its best, extending its lifespan considerably.
8.2 Cleaning the Detergent Dispenser
Regularly cleaning the detergent dispenser is crucial for optimal washer performance. At least every three months, remove the dispenser drawer by pressing the release button or lever – consult your manual for the exact location. Rinse the drawer thoroughly under warm water, removing any built-up detergent or fabric softener residue.
Use a small brush, like an old toothbrush, to scrub hard-to-reach areas. Inspect the dispenser housing within the washer and remove any lingering debris. Ensure the dispenser is completely dry before reinserting it. A clean dispenser prevents clogs, ensures accurate dispensing, and maintains the freshness of your laundry.
Parts Diagram & Replacement
Locating replacement parts for your Maytag Bravo XL washer is simplified through several avenues. A detailed parts diagram, illustrating each component’s location, is typically found within the full owner’s manual – often available online at Maytag’s official website. This diagram aids in identifying the specific part needed for repair;
Genuine Maytag parts can be purchased directly from the Maytag website or authorized appliance parts retailers. Always use genuine parts to ensure compatibility and maintain your washer’s warranty. When ordering, have your model number readily available. Commonly replaced parts include belts, pumps, and control panels. Professional installation is recommended for complex repairs, ensuring safety and proper functionality.
Warranty Information

Your Maytag Bravo XL washer is protected by a comprehensive warranty, designed to provide peace of mind. The standard warranty typically covers parts and labor for one year from the original purchase date. However, certain components, like the stainless steel wash basket, often benefit from a ten-year limited warranty against rust-through.
To make a warranty claim, retain your proof of purchase and contact Maytag’s customer service department. The warranty does not cover damage resulting from misuse, improper installation, or normal wear and tear. Registration of your appliance is encouraged, though not always required, to streamline the claims process. Full warranty details, including exclusions, are outlined in the separate warranty document included with your washer.